New with Sytist version 4.7 (changelog) is a redeveloped way for customers to select photos for their collections (also known as packages).
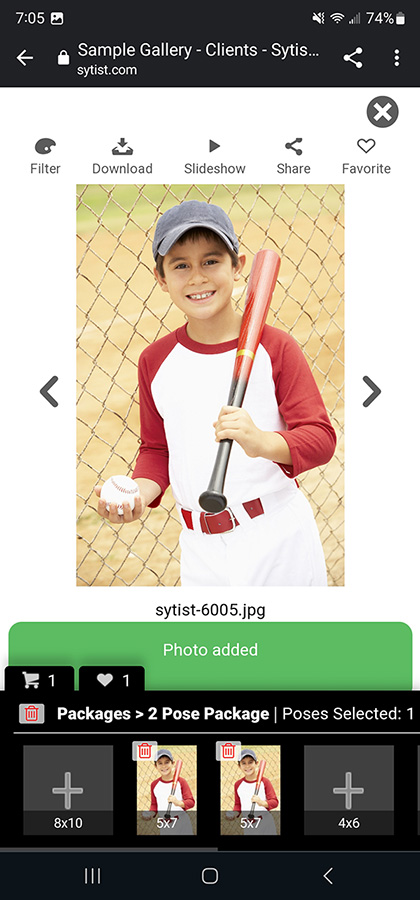
The new way adds a horizontally scrolling container at the bottom of the screen that has spots for the products in the collection. After the collection is added to cart, this area appears and the customer will tap/click the blank areas to select the photo they are viewing for that product.
This is the same for all devices but it makes it much easier for customers to select photos on mobile.
You can try it for yourself in the demo. Go into any gallery (here is one), view a photo, go to Collections, and add a collection to cart.
If there are any options or image options for the product the photo is being added to, it will popup the options for them to select.
If there are no options, then the photo is added to the product with one click/tap.
Additional changes for collections with this update:
- Now when a customer removes a photo from a 1 pose package, it removes the photo from all products. When they add a new photo to a 1 pose package, it will add the photo to all products in the package.
- When removing a photo from a package and the photo is selected for multiple products, it will give the option to remove the photo for all products or just the one.
- Collections will now NOT allow a photo to be selected twice as a download (the same download product).
- For "Selections Only" collections the option to NOT allow duplicate photos.
- With the extra photo / extra new photo on collections you can now offer the extra without an extra "new" photo. Previously a price for extra new photo was required.
Tweaks:
Language
New language was added for the new functions and they can be changed in Design -> Page Text and the newest fields are in the left column at the bottom.
Coloring
The colors are taken from the main menu of your theme. If your main menu is transparent you may not see the actual colors when editing your theme. You can uncheck transparent and tweak the colors there.
To override the colors used, you can add the following code to the additional CSS in your theme (Design -> Edit My Theme -> Additional CSS) and tweak the hexadecimal color codes. (The code below will give you black background and white text like the above screenshot).
#packagecontainer {
color: #FFFFFF;
background: #000000;
}
.managepackagetab {
color: #FFFFFF;
background: #000000;
}
.managepackagetab a {
color: #FFFFFF;
}
.managepackagetab .the-icons {
color: #FFFFFF;
}
.packageselectpackagename {
color: #FFFFFF;
border-bottom: solid 1px #FFFFFF;
}