Website name
Email address
Replace space in file / folder names with
Underscore (_)
Dash (-)
Disable right click
Ignore admin in visitor stats
Show getting started on home page
Time zone
Here is a complete list of time zones.
Eastern Time: America/New_York
Central Time: America/Chicago
Mountain Time: America/Denver
Pacific Time: America/Los_Angeles
MySQL date format
This adjust how the date is formatted. MySQL time-date format page
MySQL time format
he Automated Emails feature added in Sytist 1.3 will automatically send out gallery expiring & booking reminder emails. But for this to work your hosting account must have cron jobs available and you will need to set up the cron job in your hosting control panel. Window servers don't have cron jobs available.
See below for setting up a cron job.
How it Works
You can have up to 3 different gallery expiring emails which can be sent on different days (like one sent 7 days before expiration, 3 days, the same day). Each one you can select a different email to send so you can create new default emails and select from those. The booking reminder email will send the email associated with the service that is booked.
When editing a gallery reminder email you select how many days from the expiration date to send, the time to start sending them and who to send to (like you has access).
The basics of what happens is once a day it checks if there are any galleries expiring based on what is entered in for the days before the gallery expires. If so it sends the emails into a database table and then starts sending based on the time set in the email settings. You will also receive an email letting you know that the emails are set to go, which email is being sent, the time and the email addresses it is sending to (like people who have viewed).
Starting with Sytist version 3.8 is the option to either send an automated email, text message or both if you have text messaging enabled. The option for how to send ,
Unsubscribe Option
People receiving the emails will have to option to no longer receive those type of emails by clicking a link. If someone is on the opt-out list, they will no longer be sent the automated emails. You can see those who have opt-out in the People section.
Setting Up a CRON Job
First thing you need to do is go in your Sytist admin to Settings -> Automated Emails (cron). On that page you will see the path for the cron file which you will need to set up the cron job. Copy the the line that starts with /usr/bin/php
If you are using cPanel for your hosting control panel, it is really easy to set up.
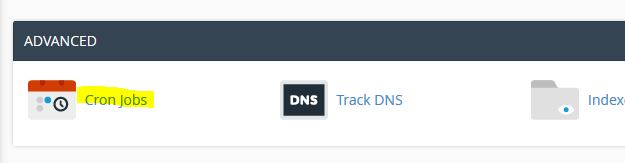
1) Log into your hosting control panel and look for the option "Cron Jobs" and click there.
2) In the Common Settings menu, select Once Per 5 Minutes and paste the line of code you copied from your Sytist admin.
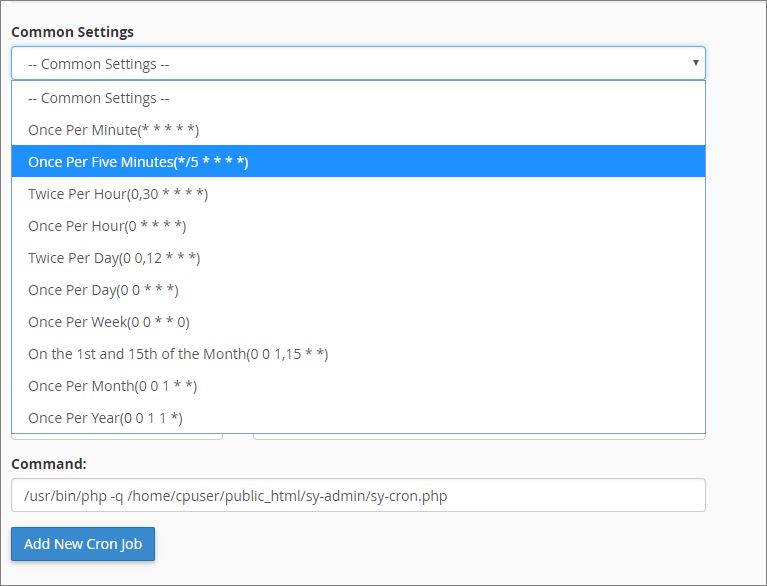
That's it. The PHP binary part (the /usr/bin/php) may be different depending on your hosting company.
Testing
To test it, in your Sytist admin go to Settings -> Automated Email and check Enable Automated Emails, check Test Mode and click Update Settings. Then after it saves, scroll to the bottom of that page and add a test email.
After you have added a test email, you should receive it within a couple of minutes. After you have successfully received a test email, uncheck the test mode option.
If the above /usr/bin/php does not seem to be working, try the following for the command:
wget -q --spider http://www.yourwebsite.com/sy-admin/sy-cron.php
Replace yourwebsite.com/sy-admin with the URL to YOUR Sytist admin.
Hosting at Host Monster, replace the the PHP binary part (the /usr/bin/php) with (this is probably outdated):
/ramdisk/bin/php5
Hosting at Hosting Matters, replace the the PHP binary part (the /usr/bin/php) with:
php -q
Hosting at SiteGround, use this:
/usr/bin/wget -O /dev/null http://www.yourwebsite.com/sy-admin/sy-cron.php
Replace yourwebsite.com/sy-admin with the URL to YOUR Sytist admin
Hosting a Lunerpages
1) Replace the the PHP binary part (the /usr/bin/php) with php -q
Example: php -q /home/cpaneluser/public_html/sy-admin/sy-cron.php
2) Edit your sy-config.php file by clicking Settings in the main menu then edit config file under the left menu.
Change :
$setup['pc_db_location'] = "localhost";
TO
$setup['pc_db_location'] = "127.0.0.1";
If you can't get the cron job working on the server, some people are using https://cron-job.org/en/ .
Currency code
Currency Sign
Price Format
Price Decimals
Minimum order amount
Secure Pages On Checkout & Accounts
Your SSL link
Tax Options
Customer Account Options
Require create an account
Your customers will have to create an account at checkout.Creating an account is optional
Disable account creation
Your customers will only be able to checkout as a guest.Terms & Conditions
Payment Options
Authorize.net AIM
Authorize.net SIM
Collect & Manually Process
Example, a customer enters in their card information and submits it.
You will get an email with half the card information like this: 41102234XXXXXXXX
When you view the order that was paid in the admin, you will see the rest of the information and the other half of the credit card like this: XXXXXXXX33445566
Then you can take to two halves to manually process. You will need an SSL / Security Certificate installed on your website to use this option.
If using this option, the order will be marked as pending until you manually run the card and then update the payment information for the order. This also means if someone orders a download product, they will not be able to download until you have changed the status of the payment.
Pay Offline
PayJunction
PayPal Standard Business
PayPal Website Payments Pro
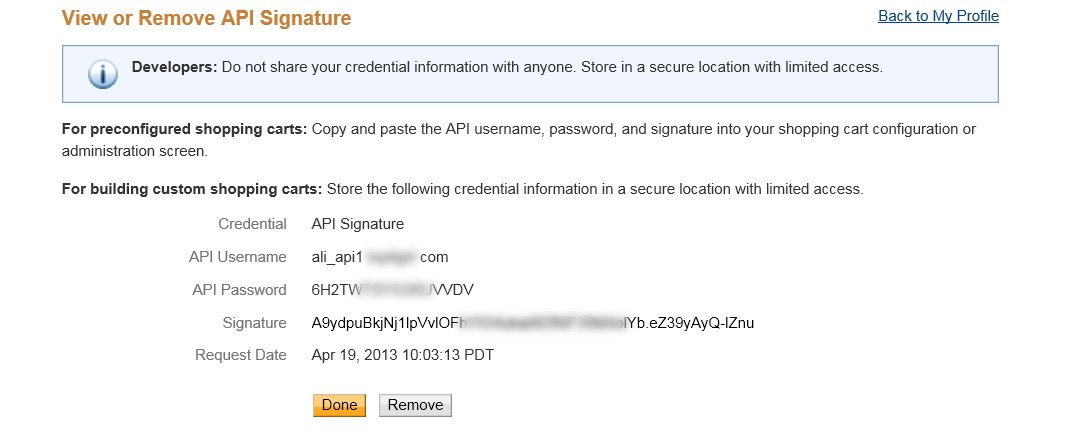
How to get your PayPal API username and password for PayPal Website Payments Pro
- Log into your PayPal account.
- Click on the person icon on the upper right corner of the page then click "Profile & Settings".
- In the left menu, click on "My selling tools".
- Next to API Access, click update.
- Request API credentials to create your own API username and password.
- Click Request API Credentials.
- Click Request API signature.
- Click Agree and Submit.
How to get your Authorize.net API username and transaction key
- Log into your Authorize.net account.
- In the left menu under "Account" select "Settings".
- Under Security Settings, select "API Login ID and Transaction Key". This page will show you your API Login ID (which is different from your account login name). Under Create New Transaction Key, enter in your secret answer and create a transaction key.
The emails are the emails sent to people when they take certain actions: place an order, order shipped, forgot password, etc...
In these emails are what is called Replace Codes. The replace codes
get replaced with information when the email is sent. Example:
[FIRST_NAME] will get replaced with the person's first name.
With each default email, it will show you a list of available replace codes you can use and what they are used for.
From name and email
By default, these emails are sent from the email address and name
you have in the Settings > Admin / Main Settings. But each default
email has the option to enter in a different email address and from
name.
Email Header & Footer
In this section, you can add a header & a footer that is added to the default emails. For example, you could add your logo or company information that will automatically be added to all of your default emails.
Email Wrapper Code
Starting with Sytist version 2.7 is Email Wrapper Code. This wraps the email in a table which contains the width of the email content. The default code makes the outer background a light gray and content area white.
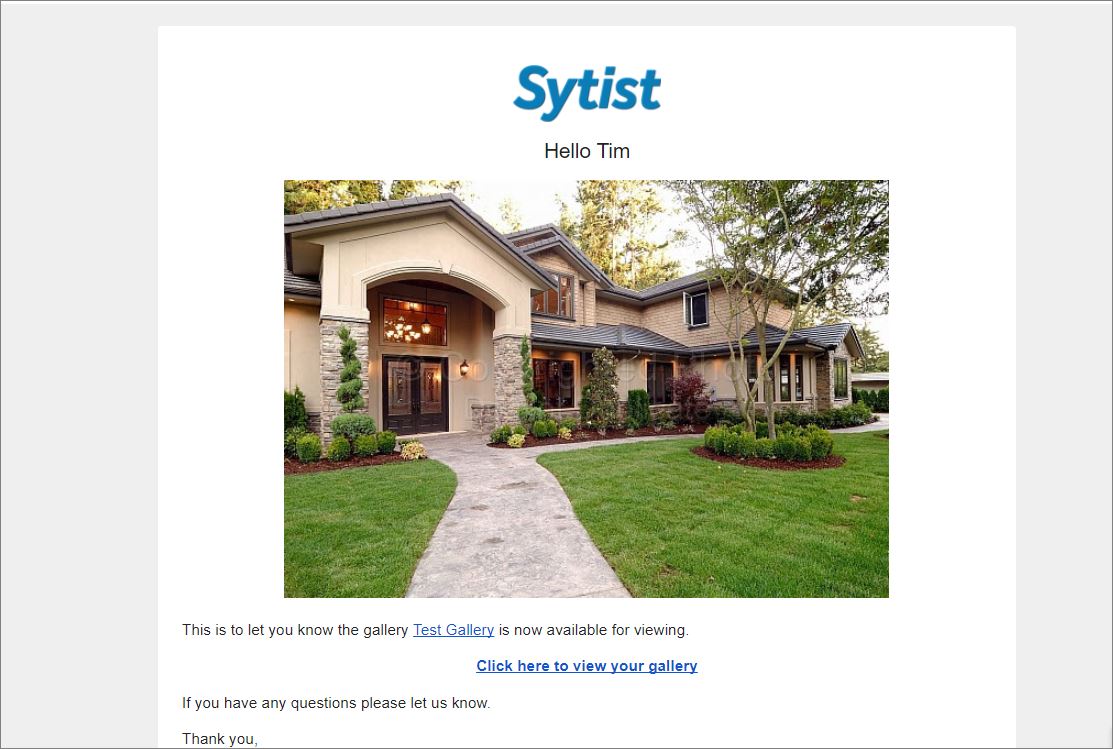
With the Email Wrapper
Without the email wrapper
Additional Replace Codes For Gallery Invite Emails
- [IMAGE_LARGE] will automatically insert the large version of the gallery cover photo.
- [IMAGE_SMALL] will automatically insert the small version of the gallery cover photo.
- [IMAGE_THUMBNAIL] will automatically insert the thumbnail of the gallery cover photo.
- [LINK_TO_PAGE] ....add your text here ... [/LINK_TO_PAGE] will automatically make a link to the page with the text you want to be clickable.
These new replace codes will work in the following default emails:
- Invite to view public page
- Invite to view password protected page
- Expiring gallery / page
- Review Your Proofs Email
- Your registry is ready
Privacy Policy
In many cases you need a privacy policy on your website. For GDPR this is required. There is a default privacy policy in this section which you should read over and make any necessary changes.
You can also create another page for a privacy policy and if you do, under the privacy policy in this section is a place to enter in the link to that page.
There is also an option in this section to have a link to your privacy policy added to the create new account page.
Cookie Notice
The cookie notice will display at the bottom of the browser window letting the visitor know your site uses cookies. This is also required for GDPR. In the cookie notice the visitor will have a link to accept and a link to view your privacy policy.
Add consent checkbox for emailing customers about their galleries or photos.
Enabling this option will add a yes / no option when a customer is creating an account, making a purchase. This is them giving you consent to send emails about the gallery like the early bird special, gallery expiring soon, etc...
Enabling this option will also add a yes / no option if you use the option to require an email address to view a gallery.
If the customer selects no, it will add their email address to the opt-out list in People -> Opt Out Emails so they won't receive any of those emails.
Meta title
This is most important one. The Meta Title is be shown at the top of the browser. This should be your website name or something similar.Meta Description
This could be a couple of sentences of description about your siteMeta Keywords
Keywords or phrases separated by a comma. Think about what someone might type in a search engine to find you. Keep it under 200 characters.Separate meta title character
This separates the page title / category / site name for the meta title. Use something like a dash or |Site name in meta title
This allows you to adjust how the title in the browser is set.Add Facebook Like Box Tab
Facebook Page Link
Share Options
AddThis.com or other third party share service
If you are using a third party share serivce like addthis.com, they will supply you with some code to add to your pages. You can copy and paste that code into this area.Disable all Facebook features
Facebook APP ID
Here you set the tax you need to charge for the state and or country. Enter in the tax percentage for your state or the VAT percentage for your country.
Show prices including VAT (or GST)
On the tax settings page at the bottom, there is an option to show your prices including VAT. This will display the price of the product plus the VAT when displayed with the product and in the cart.
To figure the price to enter for your taxable products to get the total you want displayed including VAT, use this calculation:
Price / 1.VAT%
Example, if you need the product to display as $20 including VAT (or GST) and your VAT percentage is 15%, then the price of the product you would enter would be 17.39
$20 divided by 1.15 (the .15 would be the VAT or GST percentage). If the VAT percentage is 20%, $20 divided 1.20
To make VAT show as GST instead, in Site Design -> Page Text (search the page (CTRL+F) for _vat_ and change that word to GST.
In Settings -> Tax, enter in your tax rate in the VAT option for your country.
Tax by zip code
Tax by zip code allows you to charge tax based on the zip code by uploading a CSV file with the zip codes and percentages.
1) You need a spreadsheet with at least the zip codes and tax rate. All possible options are Zip Code, Tax Rate, City, and State, but only zip code and tax rate are used.
2) Each column must be labeled (first row of the spreadsheet) as: zip, tax, city, state. It doesn't matter what order or if there are other columns but you must have a column labeled zip and tax.
3) Save your spread sheet as a CSV file.
4) Click the browse button to find the spreadsheet on your computer then click the upload CSV file.
If the zip code does not exist in the database, it will add it. If it does exist, then it will update it.
If a customer has a zip code that doesn't exist in the database, then it will use the tax percentage you have set for your state.
More decimal places for prices
If you need more decimal places for your prices for including VAT in the prices shown:
- Click Settings in the main menu of your Sytist admin
- Underneath the left menu click MySQL query.
- Copy the following lines of code and paste it in the query area and click run. This will give you 4 decimal places
ALTER TABLE `ms_cart` CHANGE `cart_price` `cart_price` DECIMAL( 10, 4 ) NOT NULL DEFAULT '0.00';
ALTER TABLE `ms_photo_products` CHANGE `pp_price` `pp_price` DECIMAL( 10, 4 ) NOT NULL DEFAULT '0.00';
ALTER TABLE `ms_photo_products_connect` CHANGE `pc_price` `pc_price` DECIMAL( 10, 4 ) NOT NULL DEFAULT '0.00';
ALTER TABLE `ms_packages` CHANGE `package_price` `package_price` DECIMAL( 10, 4 ) NOT NULL DEFAULT '0.00';
ALTER TABLE `ms_products_discounts` CHANGE `dis_price` `dis_price` DECIMAL( 10, 4 ) NOT NULL DEFAULT '0.00';
ALTER TABLE `ms_product_options` CHANGE `opt_price` `opt_price` DECIMAL( 10, 4 ) NOT NULL DEFAULT '0.00';
ALTER TABLE `ms_product_options` CHANGE `opt_price_download` `opt_price_download` DECIMAL( 10, 4 ) NOT NULL DEFAULT '0.00';
ALTER TABLE `ms_product_options_sel` CHANGE `sel_price` `sel_price` DECIMAL( 10, 4 ) NOT NULL DEFAULT '0.00';
ALTER TABLE `ms_image_options` CHANGE `opt_price` `opt_price` DECIMAL( 10, 4 ) NOT NULL DEFAULT '0.00';
ALTER TABLE `ms_cart_options` CHANGE `co_price` `co_price` DECIMAL( 10, 4 ) NOT NULL DEFAULT '0.00';
ALTER TABLE `ms_packages_buy_all` CHANGE `ba_price` `ba_price` DECIMAL( 10, 4 ) NOT NULL DEFAULT '0.00';
ALTER TABLE `ms_packages` CHANGE `package_buy_all_set_price` `package_buy_all_set_price` DECIMAL( 10, 4 ) NOT NULL DEFAULT '0.00';
ALTER TABLE `ms_photo_products_discounts` CHANGE `dis_price` `dis_price` DECIMAL( 10, 4 ) NOT NULL DEFAULT '0.00';
ALTER TABLE `ms_calendar` CHANGE `prod_price` `prod_price` DECIMAL( 10, 4 ) NOT NULL DEFAULT '0.00';
ALTER TABLE `ms_product_options` CHANGE `opt_price_checked` `opt_price_checked` DECIMAL( 10, 4 ) NOT NULL DEFAULT '0.00';
ALTER TABLE `ms_calendar` CHANGE `prod_sale_price` `prod_sale_price` DECIMAL( 10, 4 ) NOT NULL DEFAULT '0.00';
ALTER TABLE `ms_calendar` CHANGE `book_deposit_flat` `book_deposit_flat` DECIMAL( 10, 4 ) NOT NULL DEFAULT '0.00';
Adding a watermark on your photos can help protect people from taking them.
When you choose watermark photos, the watermark is applied to the
photos when they are uploaded with the exception of the original
uploaded file.
Watermark placement
There are several options in the placement of the watermark. In those options is a "tile" option. This will tile the watermark file over the entire photo.
Logo
There is also an option to add a logo to the photo. This will also need to be a .png file and you don't want this one too large (around 150 x 50 pixels).
Set a default watermark on a per section/category basis
This feature was added in Sytist 4.1. This allows you to have different watermark defaults based on categories. To do so, edit your category / section and go to Defaults -> Watermarking.
Creating your own watermark
Watermarks are transparent png files that are applied over the photo. You will need to use Photoshop or some photo editing program to create your own watermark.
Start with a photo that is around 1600 pixels wide at 72 DPI. Add the text over the photo you want to be the watermark. White text is best.
Add a drop shadow to the photo. These are suggested settings for the drop shadow.
Blend mode: normal
Opacity: 100%
Distance: 3
Spread: 100%
Size: 0-3
After you get the text how you want it, set the opacity of the text layer somewhere between 10 - 40%.
Hide your background layer so you only have your text layer(s) showing.
If you are going to set the watermark to apply in the center or one location of the photo, trim your file to remove all the excess transparent space. Image > Trim > Based On: Transparent Pixels , trim away all > OK.
If you are going to set the watermark to tile over the photo, crop the watermark so there is spacing on all sides.
Save your watermark file. File > Save As then in the Format option in the dialog window, select PNG (.png). PNG options: Interlace: None.
Click here for a zip file of the default watermarks Photoshop files.

Loading more pages