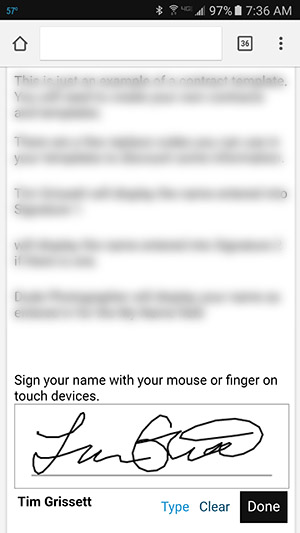
Starting with Sytist version 1.6 is the ability to create contracts and email them for your clients to electronically sign. They can sign by either writing their name with their finger or mouse or typing in their name. You can also attach an invoice for them to make payment on after they have signed the contract.
Here is a sample contract in the demo.
First thing you will need to do to get started with contracts is go to People -> Contracts and click the Directory tab (or the link in the yellow notice). The directory / link needs to be created because the contracts are displayed outside of the design of your site so just the contract is shown. This only needs to be done once.
Next go to Contracts -> Templates and create the contracts you want available (or create a contract for a client and select the save as template option). You can select from these template when creating a contract for a client.
To create a contract for a client, go to the People section and find your client's account. If they don't have one, you can create an account for them. (They do not have to log in to view and sign a contract). Click the Contracts tab in their account then the + Contract button.
When adding or editing a contract:
Title: Title of the contract for your reference (example: wedding contract).
Templates: Select from templates you have created.
Signature 1: The name of the person signing the contract the way they would sign it.
Signature 2 (optional). If a second person (other than you) needs to sign the contract, enter in the name there.
Email 1 & 2: The email addresses of the people signing the contract.
Due Date: The due date is added to the email that is sent to the client.
My Name: This is YOUR name and how you would sign the contract.
NOTE: When you are signing a contract, you have the option to save your signature as your default signature whether you sign it or type it. Once you do that, you will have the option to sign the contract when created with that signature.
Contract: The actual contract.
Attach Invoice: Attaching an invoice that you have created for the client will prompt them to make a payment on the invoice after the contract is signed.
PIN Number: The PIN number is for added security which the client will enter in to view and sign the contract. If you are logged into the admin, you will not need to use the PIN number.
Adding Form Fields
Starting with Sytist version 2.1 is the option to add form fields to contracts to be filled out by the client who is signing the contract. To add these form fields, add the bracket codes below in the content of the contract where you want them to appear.
[TEXT_INPUT_OPTIONAL]
This will be replaced with an optional form field to be filled out with the size of 20.
[TEXT_INPUT_REQUIRED]
This will be replaced with a REQUIRED form field to be filled out with the size of 20.
[TEXT_INPUT_SHORT_OPTIONAL]
This will be replaced with a small optional form field to be filled out with the size of 4 (initials for example).
[TEXT_INPUT_SHORT_REQUIRED]
This will be replaced with a small REQUIRED form field to be filled out with the size of 4 (initials for example).
[CHECKBOX_OPTIONAL]
This will be replaced with a checkbox that is optional.
[CHECKBOX_REQUIRED]
This will be replaced with a REQUIRED checkbox.